# Lesson 12 Tic Tac Toe Game
# Lets Create a Tic Tac Toe Game
There are different ways to control an application's logic and flow, we are going to use event-driven architecture for our Tic Tac Toe Game. We will use the following skills we learned in previous lessons.
- CSS from Lesson 4 and 5 to style our board
- JavaScript from Lessons 8-11
- Object variable from Lesson 9 to hold the state of our game board
- Events from Lesson 11 to control user interaction with our board
- JavaScript and DOM control from lesson 10 to update our board
# Event-Driven Architecture
Event-driven programming is a programming paradigm in which the flow of the program is determined by events such as user actions (mouse clicks, key presses), sensor outputs, or messages from other programs or threads. Event-driven programming is the dominant paradigm used in JavaScript web applications because they are centered on performing certain actions in response to user input.
For the Tic Tac Toe game, the control of flow is through user click events. Event-driven means that our web application will wait till the user interacts by clicking with a mouse. When our application starts we need to set up the board for an initial state with a clean board and no winner. Then when the user clicks un an un-occupied board square our code will update the board and check for a win condition.
When the user clicks on a square and triggers our game logic we need to know the state of the board, so we will use a local object variable in our JavaScript code to keep track. This works well for our example but doesn't persist when a user reloads our page or closes the page session. A page session ends when the page/tab is closed. If you want to create applications whose data persists past a refresh or session end, read about window.localStorage on MDN.
# Draw Our Tic Tac Toe Board
Let us keep our HTML simple and then use CSS to style the way our board looks. A tic tac toe board is basically a grid with 3 rows and 3 columns. We want our squares to be clickable, so let layout our board using div's with id's that uniquely identify each square.
<!DOCTYPE html>
<html>

<head>
    <meta charset="utf-8" />
    <meta http-equiv="X-UA-Compatible" content="IE=edge">
    <title>Tic Tac Toe</title>
    <meta name="viewport" content="width=device-width, initial-scale=1">
    <link rel="stylesheet" type="text/css" media="screen" href="main.css" />
    <script defer src="main.js"></script>
</head>

<body>
    <h1>Tic Tac Toe</h1>
    <div class="board">
        <div>
            <div id="00" class="sq bottom right"></div>
            <div id="01" class="sq bottom right"></div>
            <div id="02" class="sq bottom "></div>
        </div>
        <div>
            <div id="10" class="sq bottom right"></div>
            <div id="11" class="sq bottom right"></div>
            <div id="12" class="sq bottom"></div>
        </div>
        <div>
            <div id="20" class="sq right"></div>
            <div id="21" class="sq right"></div>
            <div id="22" class="sq"></div>
        </div>
    </div>
</body>

</html>
We have given each square a unique id which contains first the row 0, 1, 2 then it's column 0, 1, 2.
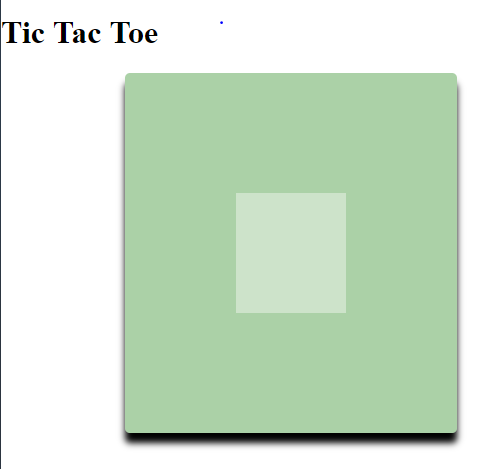
This looks like nothing so far because our div elements are really just there for us to style with CSS and add functionality with JavaScript.
We have also added a class of "sq" so that our CSS can style each square box in our grid by referencing its class.
Let's add some CSS.
body {
    margin: 0;
    padding: 0;
    box-sizing: border-box;
}

.board {
    display: block;
    margin: auto;
    width: 332px;
    height: 360px;
    background-color: rgba(15, 139, 21, 0.4);
    overflow: hidden;
    z-index: 1;
    border-radius: 5px;
    box-shadow: 0px 10px 10px;
}

.sq {
    display: inline-block;
    vertical-align: top;
    height: 90px;
    width: 110px;
    margin-right: -3px;
    text-align: center;
    font-size: 60px;
    padding-top: 30px;
    cursor: pointer;
    font-family: sans-serif;
    transition: background 0.3s;
}

.sq:hover {
    background: rgba(255, 255, 255, 0.4);
}
We are also adding a hover transition to our "sq" boxes so that the user can visually see when their mouse is over a square.
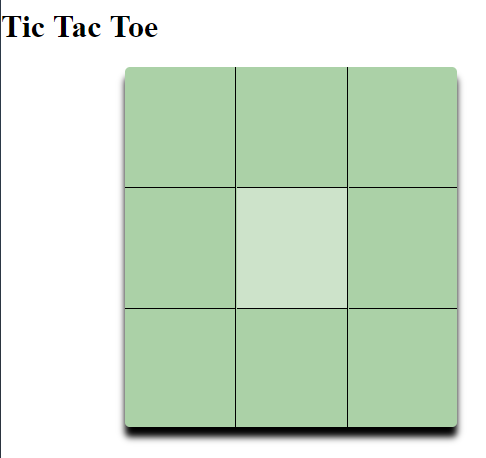
So far all we have is a board with boxes, but no visible lines to tell the user this is a tic tac toe board. see the effect on the center box using .sq:hover

We need to add lines to the bottom the right of the first and second box of the first row. Only add a bottom line to the last column of the first row. We can accomplish this with some simple CSS and additional class names on our div squares.
  <div class="board">
    <div>
      <div id="00" class="sq bottom right"></div>
      <div id="01" class="sq bottom right"></div>
      <div id="02" class="sq bottom "></div>
    </div>
    <div>
      <div id="10" class="sq bottom right"></div>
      <div id="11" class="sq bottom right"></div>
      <div id="12" class="sq bottom"></div>
    </div>
    <div>
      <div id="20" class="sq right"></div>
      <div id="21" class="sq right"></div>
      <div id="22" class="sq"></div>
    </div>
  </div>
CSS
.bottom {
  border-bottom: 1px solid black;
}

.right {
  border-right: 1px solid black;
}

Now add some simple JavaScript code to add a click event to each square.
// set up the inital state of the board by creating our gameState variable.
let gameState = {};

InitializeBoardState();

function InitializeBoardState() {
    gameState = {
        board: [
            ['', '', ''],
            ['', '', ''],
            ['', '', '']
        ],
        Next: "X",
        Winner: ""
    };

    // add events for when the users click on squares.
    document.querySelectorAll('.sq').forEach((element) => {
        element.addEventListener('click', MainGameLogic);
    });
}

// Event based game loop, called when the user click/chooses a game board square.
function MainGameLogic(event) {
    // event.target.id[0] returns a string, so we need to convert it to a number.
    let row = Number(event.target.id[0]);
    let col = Number(event.target.id[1]);

    alert(`You have clicked on row ${row} and column ${col}`);
}
- Video Link Draw Our Tic Tac Toe Board
- Length: 7:15 minutes
- Size: 28.9 MB
# Breakdown Code Into Smaller Pieces
There is a very important engineering principle that we need to keep in mind when creating our application.
- Divide and Conquer -> Break down larger problems into multiple smaller problems that can be worked on independently.
- KISS (Keep It Simple, Silly) -> Simplicity makes your solution easier to read, fix, explain to others.
- DRY (Don't Repeat Yourself) -> If you find yourself copy and pasting code, create a reusable function.
So lets start by looking at the code we have already created, then expand one small simple step at a time.
- Initialize our game starting state on load.
let gameState = {}; // Declare our variable here at the top level
InitializeBoardState();
Why do our Initialization in a function?
- Divide and Conquer -> we break related code into separate functions.
- DRY -> We want to re-initialize our board after playing a game, so we can play again. By breaking initialization out into a function that worked both when the app loads and when the user chooses to restart prevents duplicate code.
- In our Initialization we will:
- Set the board grid to empty squares, no winner, and the first player is X, not O.
- Add an event to every square (empty square) for the click event.
- update the screen for the current state, do this by calling a function called UpdateScreenState();, which we can re-use after a new square is selected.
Add a call to InitializeBoardState function inside the InitializeBoardState function and at the end of the MainGameLogic function.
function InitializeBoardState() {
    gameState = {
        board: [
            ['', '', ''],
            ['', '', ''],
            ['', '', '']
        ],
        Next: "X",
        Winner: ""
    };

    // add events for when the users click on squares.
    document.querySelectorAll('.sq').forEach((element) => {
        element.addEventListener('click', MainGameLogic);
    });

    // Update the screen so it is ready to go for the first turn.
    UpdateScreenState();
}

// Event based game loop, called when the user click/chooses a game board square.
function MainGameLogic(event) {
    // event.target.id[0] returns a string, so we need to convert it to a number.
    let row = Number(event.target.id[0]);
    let col = Number(event.target.id[1]);

    UpdateScreenState();
}
We need to add a function which updates our page with the current state stored in the gameState variable.
// Use our gameState data to update what is displayed on our app page
function UpdateScreenState() {
    // Update each of the board squares based on gameState
    for (let row = 0; row <= 2; row++) {
        for (let col = 0; col <= 2; col++) {
            document.getElementById(`${row}${col}`).innerText = gameState.board[row][col];
        }
    }
}
Notice that we use two loops, col inside row, to cover each row x column combination (all 9).
We use our row and col Number variables to construct the id string needed to retrieve div element for each game board square.
When constructing a string using back-ticks `` we can include references to variables by using ${} syntax.
${row}${col}
is the equivalent of
row.toString() + col.toString()
# Lets Focus On Details of MainGameLogic Function
Every time the user clicks/chooses a game board square we call this function. What are the main things we need to accomplish in our function.
Add the next X or O to the game board state stored in the gameState variable.
Check to see if we have a winner or a tie because the game board is full.
Remove the click event that called this function from the current div element so that the user can't call this function again. Note that if we reset the game board we will need to restore the event.
Update the screen with the new X or O and display the Winner if found.
Add the next X or O
    // event.target.id[0] returns a string, so we need to convert it to a number.
    let row = Number(event.target.id[0]);
    let col = Number(event.target.id[1]);

    // add the next X or O
    gameState.board[row][col] = gameState.Next;
    // change the next X or O
    gameState.Next = gameState.Next === "X" ? "O" : "X";
Number() is a function that converts a string to a number. We want to use a number for row and col variables because the arrays storing our board index with numbers 0 ... 2
We are keeping track of who's turn it is by storing an X or O string in the state variable gameState.Next.
After we place the current X or O in gameState.board[][] location, we want to swap X and O stored in gameState.Next so that the next time we call MainGameLogic we switch.
We are using the ternary if operator to switch the gameState.Next variable back and forth between X and O. You can find more details on the conditional ternary operator at MDN, lets break it down.
- gameState.Next =
- assign the results of our ternary to the right of this equals to the object variable gameState property Next.
- conditional operator ? true result : false result;
- gameState.Next === "X" check if gameState.Next is a string containing X
- if true return "O"
- : else return "X"
- gameState.Next =
- Video Link Tic Tac Toe Board Functional
- Length: 20:33 minutes
- Size: 109 MB
- Download the Tic Tac Toe project from GitHub https://github.com/mhintegrity/lesson12
# No Assignment Due, Enjoy Christmas Break
# Challenge for extra credit
Start with my lesson 12 code, and add some of the following features, then save it to your github account under a repo named: TicTacToe
- Add a button with code that has the computer choose a location for the next X or O.
- You may use images and/or other techniques you have learned to make the board look the way you want it to look.
- Add variables to keep track of X wins and O wins. Display this information at the bottom of the app page. One place to increment your X win and O win variables is at the end of the function CheckForWinner(), before returning the result. Make sure to update your screen in the UpdateScreenState() function.
