# Lesson 18 Intro Vue.js
# JavaScript Frameworks
A JavaScript framework is an application framework written in JavaScript. It differs from a JavaScript library in its control flow: a library offers functions to be called by its parent code, whereas a framework defines the entire application design. A developer does not call a framework; instead, it is the framework that will call and use the code in some particular way.
# What is Vue.js?
Vue (pronounced /vjuː/, like view) is a progressive framework for building user interfaces. Unlike other monolithic frameworks, Vue is designed from the ground up to be incrementally adoptable. The core library is focused on the view layer only, and is easy to pick up and integrate with other libraries or existing projects. On the other hand, Vue is also perfectly capable of powering sophisticated Single-Page Applications when used in combination with supported libraries.
# Choosing Vue.js For This Class
Why did I teach Vue.js for this course?
- Vue.js is one of the top 3 most used and supported frameworks.
- It has an easier learning curve than other frameworks.
- Vue.js has documentation to assist those new to JS frameworks.
- Vue.js is a progressive framework.
- Here is a decent blog discussing most of the major JavaScript frameworks: https://raygun.com/blog/popular-javascript-frameworks/
- Here is another blog Top 3 Best JavaScript Frameworks for 2019
Checkout the Vue.js website. https://vuejs.org/
What is a Progressive Web App?
- Progressive web pages (PWA) act more like phone apps then traditional web pages.
- PWA are progressive, this means that they deliver user experience through progressive enhancement. For example, they become more app like depending on what device and browser they are on.
Google has published a Baseline Progressive Web App Checklist
# Vue.js helps us to create our PWA's by the following:
- You can plug it into just one part of your page/app, allowing you to progressively enhance it
- Has core libraries and add-on libraries to scale your page to a full function app. Here are some additional libraries which add features and functionality.
- Vuex: Vuex is a state management pattern + library for Vue.js applications.
- Vue-Router: Vue.js Router is the official router for Vue.js.
- Vutify: Material Design Component Framework.
- Vue.js allows you to split your page into reusable components.
Easiest way to start is to include vue.js in a regular html page.
- Lets start with a basic html page and add a reference to the Vue.js library.
- Then we add a div with an id of app, this element is what Vue.js will control.
- We will add our Vue.js app code in another file named app.js
<!DOCTYPE html>
<html>
<head>
    <title>Hello World</title>
    <script defer src="https://unpkg.com/vue"></script>
    <script defer src="app.js"></script>
</head>
<body>
    <h1>Vue Basics</h1>
    <div id="app"></div>
</body>
</html>
- The scripts with the
deferattribute wait until the entire parser is done and then runs all scripts marked with defer in the order they were encountered. This allows you to mark several scripts that depend upon one another as defer. They will all get postponed until after the document parser is done, but they will execute in the order they were encountered preserving their dependencies. Technically, the browser may be downloading the scripts in the background at any time, but they won't execute or block the parser until after the parser is done parsing the page.
// Vue instance takes control of: the first parameter el tells it which element in the html. The #app is a CSS selector.
new Vue({
    el: '#app'
})
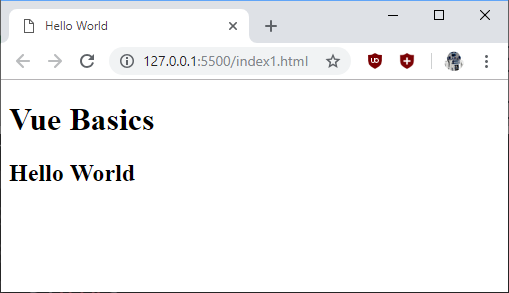
- Lets add an h2 tag inside the div.app
- define a new property in Vue -> data: {}
- data is an object the defines that data for our instance of Vue
- We could store an array, or for our example add a string 'Hello World' for variable we name title
new Vue({ el: '#app', data: { title: 'Hello World' } }) - Output the data in our element using Vue.js template syntax, double curly braces
This replaces text, but we don't use it for attributes in our elements.<div id="app"> <h2>{{ title }}</h2> </div>- Now open your index.html page with live server, so we can see the effect.
- Video Link Section 1 - 3
* Length: 9:30 minutes
* Size: 29 MB
- Now open your index.html page with live server, so we can see the effect.
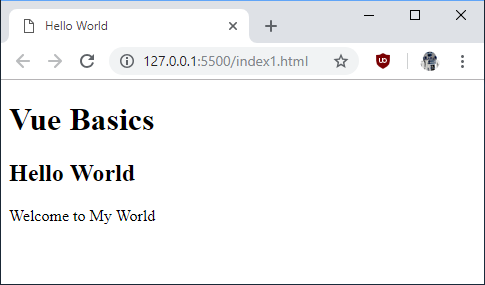
- Lets do the same thing again, except lets add a method (function)
- index.html
<div id="app"> <h2>{{ title }}</h2> <p>{{ greet('Frank') }}</p> </div>- app.js
data: { title: 'Hello World' }, methods: { greet(name){ return `Welcome to My World ${name}` } }- look again at your page
- Video Link Section 4
- Length: 2:31 minutes
- Size: 7 MB
- Video Link Section 4
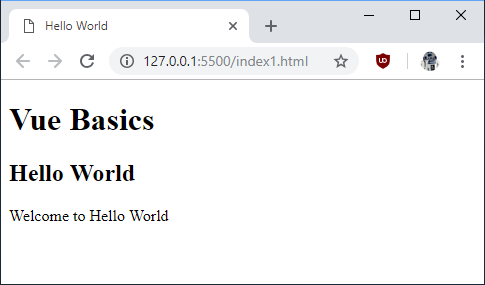
- We can refer to our data variables inside our methods, which are just JavaScript functions.
- Use the JavaScript command
thisand then the variable in data inside our function. - app.js
data: { title: 'Hello World' }, methods: { greet(){ return `Welcome to ${this.title}` } }- look again at your page, see that it went from
My WorldtoHello World
- Use the JavaScript command
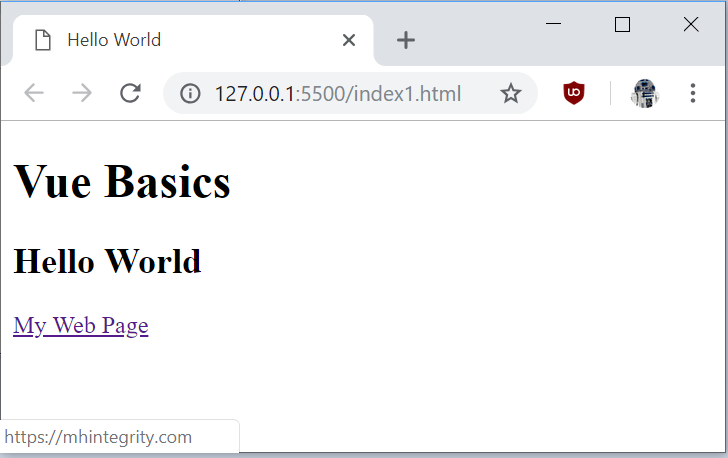
- Vue supports one-way and two-way binding of html element attributes to Vue data variables. Lets start with a simple one-way binding, we add the prefix
v-bind:before an attribute.- index.html
<div id="app"> <h2>{{ title }}</h2> <a v-bind:href="url">My Web Page</p> </div>- app.js
data: { title: 'Hello World', url: 'https://mhintegrity.com/' }- look again at your page, see that it went from
My WorldtoHello World
- Video Link Section 6
- Length: 3:20 minutes
- Size: 10 MB
- Video Link Section 6
- Now lets add an input element to our html page and use it as a parameter to our method.
- Lets learn about the input element at MDN developer web page
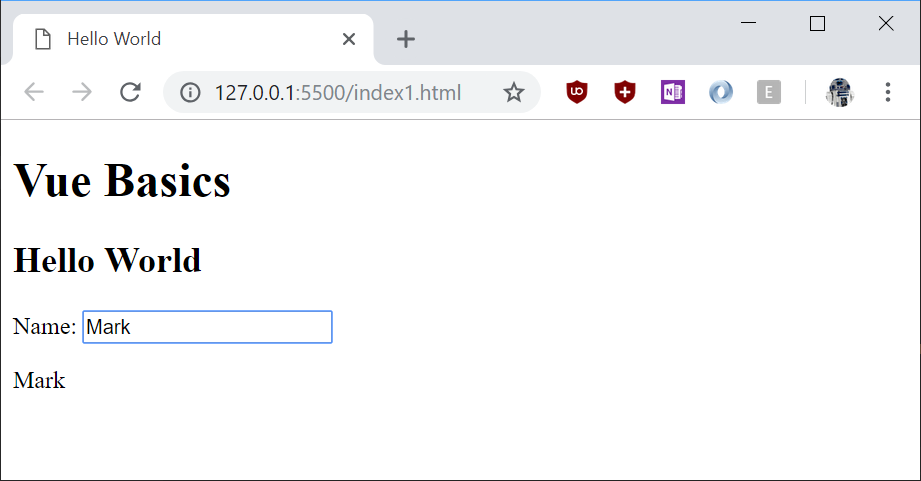
- We want to bind our input control to a data item. We want that data binding to be two way. Vue has another binding prefix v-model: which is for two-way data binding.
v-modelwill ignore the initialvalue,checkedorselectedattributes found on any form elements. It will always treat the Vue instance data as the source of truth. You should declare the initial value on the JavaScript side, inside thedataoption of your component.- index.html
<div id="app"> <h2>{{ title }}</h2> <label for="userName">Name:</label> <input type="text" id="userName" v-model:value="userName"> <p>{{ userName }}</p> </div>- app.js
data: { title: 'Hello World', userName: '' }- look again at your page
- Video Link Section 7
- Length: 5:32 minutes
- Size: 19 MB
- Video Link Section 7
# Assignment due for discussion next class and checked into GitHub by the Monday after that.
- Create a new repo called lesson18
- Like the last section create a simple Vue page with two-way binding. Study the MDN page on the HTML element Input
- Create an page where you use input types and try two-way binding. Choose 3 from this list.
- text
- button
- checkbox
- date
- number
- password
