# Lesson 21 Vue.js Cli
So far we have been building simple pages by injecting Vue into our html pages.
Now we want to grow the complexity of our applications, so we are going to use a tool that provides a full system for rapid Vue.js development. There is a command line tool that will help setup our project, help us build our project, and allows us to select which libraries our project will be using, then automatically plugs them into our project.
The Vue CLI (Command Line Interface) Is documented online with this link.
# Steps to Install
Open a command line terminal to your code directory
src(This assumes that you have installed NodeJS as part of lesson 17)Install the Vue CLI
npm install -g @vue/cli
- after installation you can check the version
vue --version
3.5.XCreate our project using the CLI we just installed.
vue create lesson21
- This creates a directory named
lesson21for a project of the same name. - You will be presented with a series of questions, that will be used to by the tool to build the initial project files for you.
- For our first project we are going to use the default (babel, eslint).
- If there is an update available for the CLI it will say
Update available: 3.5.XIf this happens, stop by Ctrl-c and go back to step 2 to install the CLI.
default (babel, eslint)
- PRESS ENTER
cd lesson21
lesson21> npm install- running npm install will make sure to update all the libraries our project needs.
- These libraries will be installed in a directory called
node_modules - Don't touch this directory, and git will not push these files to github.
- The file
.gitignorestores a list of files that git will not save to github.
- This creates a directory named
Add git and push your basic project to github.
git init
- in your github account add a new repository named
lesson21 - run the
git remoteandgit pushcommands locally - check the code which you have now pushed to the new repository on github.
- in your github account add a new repository named
Run your new project locally to see it, this replaces what you have been using the extension
Live Sharefor.lesson21> npm run serve
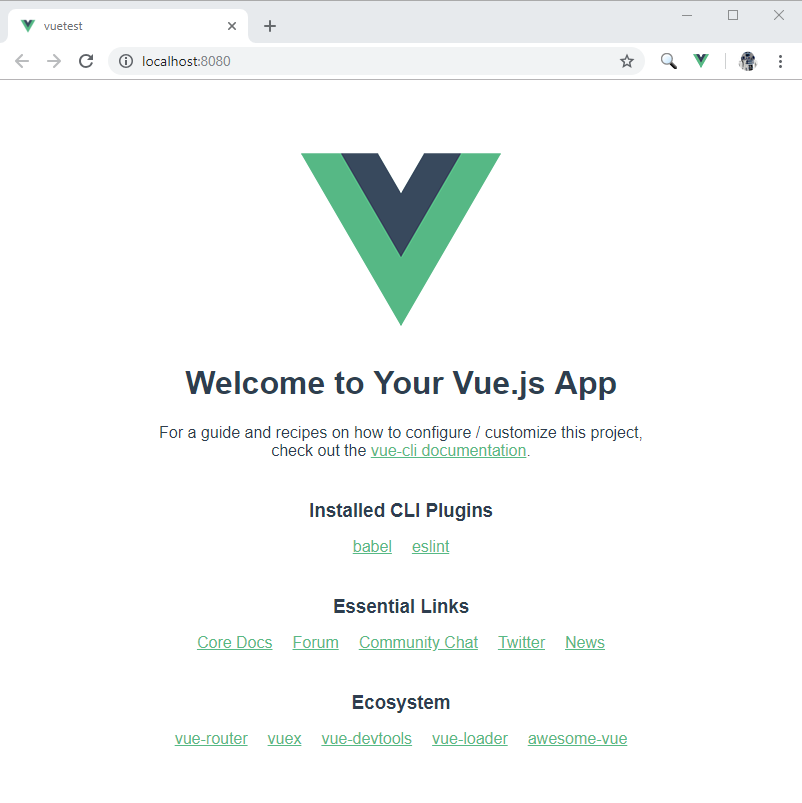
- view the app in your browser by clicking the Local link (http://localhost:8080/)[http://localhost:8080/]

- Video Link Install Vue Cli
- Length: 17:25 minutes
- Size: 65 MB
# Lets looks at our new project directory structure.
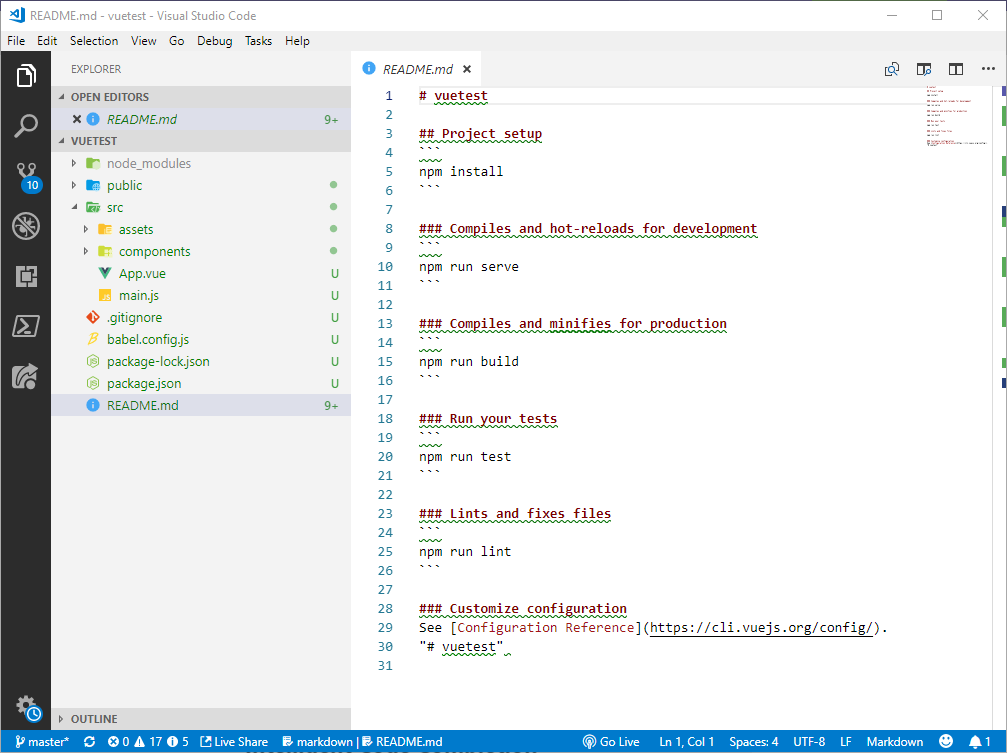
If we open our new project in VS Code, it will look something like this.
vscode .
Vue Cli uses Webpack to build our application with all the JavaScript files, CSS and other dependencies together and optimized for deployment.
dist=> after we build our projectnpm run buildwe will get a directory here that is the files for distribution to our web server.node_modules=> all the libraries we need to build our project are stored (and not saved to git)public=> directory where the files are that we don't want to process through webpack, but are part of our project.src=> where our application specific code files go.assets=> store assets such as imagescomponents=> components/building blocks of our applications.views=> where we store the different "pages" of our appApp.vuefile => The root component which all other components are nested within like a tree.main.jsfile => File that render our app and mounts it to the DOM.
.gitignorefile => specify what we want git to ignorebabel.config.jsfile => used by babel (babel translates our code so our website works in older browsers)package-lock.jsonfile used by npmpackage.jsonfile => these two are used by npm to handle the project dependencies (libraries)
# How is the app being loaded when it runs
main.js =>
import Vue from "vue";loads the vue application library (like we put the script tag in our html header)import App from "./App.vue";load the root component of the application.line 6: we create a new Vue and mounts it.
When our app starts it will load up the index.html under the public directory, inside the index.html file, this looks like all the other vue projects we have made so far.
# Create Single File Components
In VS code lets open our new lesson21 basic project. Lets add a new component file. (What is a component file?)
- Select our
componentsdirectory, click + New File and name itAwardCard.vue - in the file type
scaffoldand tab to fill in a component scaffolding. Inside template typediv>ul>li[tab]to fill in a div, ul, li tag combo, that looks like:
<template>
    <div>
        <ul>
            <li></li>
        </ul>
    </div>
</template>

<script>
export default {

}
</script>

<style>

</style>
Up to this point we have defined our components using Vue.component, followed by new Vue({ el: '#app' }) to target a container element in the body of every page.
This works well for small projects. In more complex projects this can cause us problems like a global definition forces unique names for every component, and no modular CSS support.
All of these are solved by single-file components with a .vue extension., and then using build tools to compile our final pages.
Single-file components have three sections:
<template>- Our HTML template can be fully flushed out here.
- Remember that every component must have a single root element.
<script>- Ths script section is where our JavaScript is, including our Vue code.
<style>- The style section stores CSS that is limited in scope to this component.
# Naming Components
When naming your components use kebab-case.
<my-component-name\>
- All lower case words
- Use - dash to separate words. no spaces
- I recommend starting all your components with a short acronym unique to your or your project.
e.g.
<mh-component-name>mh for Mr Harder, or use a company name or ... you choose. - Remember to keep names short and meaningful.
# Passing Data to a Component with Props
A component won’t be useful unless you can pass data to it, such as the title and content we want to display. That’s where props come in.
Props are custom attributes (properties) you can register on a component. When a value is passed to a prop attribute, it becomes a property on that component instance.
Lets see this in a simple example.
Vue.component('mh-award', {
    props: ['title'],
    template: '<h2>{{ title }}</h2>'
})
Once a prop is part of your custom component, you can pass data to it as a custom attribute (like an element in HTML)
<mh-award title="Black Belt"></mh-award>
<mh-award title="The Machine"></mh-award>
# Example App lesson21 Continued
Lets take what we are learning about components and walk through a sample app to display our martial arts awards app.
Lets make up a few awards for our fake martial arts awards site.
Closed Fist
- lets get an image from
pexels.comsearch forfistchoose one and save free small image to our/src/assetsdirectory.
- lets get an image from
Dragon Spirit
- Lets now get an image from
pexels.comsearch fordragonchoose one and save a small free image to our/src/assetsdirectory.
- Lets now get an image from
High Kick
- Lets now get an image from
pexels.comsearch forkaratechoose one and save a small free image to our/src/assetsdirectory.
- Lets now get an image from
Lets also get the Active Martial Arts logo to use at the top of our page.
- Lets now get an image from Active Martial Arts Mill Creek I work with Jeff Kyle at Active, so for this lesson we can locally use their logo. Right click and save this image
 to our
 /src/assetsdirectory.
- Lets now get an image from Active Martial Arts Mill Creek I work with Jeff Kyle at Active, so for this lesson we can locally use their logo. Right click and save this image
Lets remove the
logo.pngfrom our/src/assetsdirectory.
# Build our AwardCard.vue component
We want to create a card layout that displays an image, title and description. First we need Prop data that will be passed in and used in our component.
Often we want more than one or two variables, so we will pass in a JavaScript object that has multiple properties. In our script section lets add the props (data variables we will be passing into the component.)
<script>
export default {
    props: {
        award: {
            type: Object,
            required: true
        }
    }
};
</script>
- The official documentation here https://vuejs.org/v2/guide/components-props.html#Passing-Static-or-Dynamic-Props explains how to pass variables like Number, Boolean, Array. We are using an object so we use this:
    award: {
        type: Object,
        required: true
    }
- You might think that it should look like this:
    award: {
        id: Number,
        title: String,
        detail: String,
        imageurl: string
    }
- We don't want to define ahead of time what the details of the object are, so instead
type: Objectis used. - We can use the property
required: trueon any prop to make sure that it is required to be passed into the component. For example we can use the required on a simple String prop in this example.
    propA: {
        type: String,
        required: true
    }
# HTML Template Section
We are going to display our AwardCard components as items <li> in an html list li
So in the template section of our new vue component lets add the card html code.
  <template>
      <li class="card">
          <img v-bind:src="award.imageurl" style="width:100%">
          <div class="container">
              <h4><b>{{ award.title }}</b></h4>
              <p>{{ award.detail }}</p>
          </div>
      </li>
  </template>
- We have an html element image
<img v-bind:src="award.imageurl">and in this element we want to display an image, so we bind our data item in props for the image url path. - Because our component will be used over and over, we don't want to hard code specific data, that is why we bind it to our prop data.
- Now we need to display our title
<h4><b>{{ award.title }}</b></h4>
- Also display our details
<p>{{ award.detail }}</p>
- We notice that the
v-bind:src=""doesn't use the{{}}, but in the case of attributes it is assumed adata/JavaScriptitem between the quotes"".
# Style Template Section
We want our components to look like cards that contain our image and text.
I am not going to go into detail on the CSS, but here is some example CSS you can use for your component.
<style>
    .card {
        /* Add shadows to create the "card" effect */
        box-shadow: 0 4px 8px 0 rgba(0,0,0,0.2);
        transition: 0.3s;
        max-width: 500px;
        margin: 10px;
    }

    /* On mouse-over, add a deeper shadow */
    .card:hover {
        box-shadow: 0 8px 16px 0 rgba(0,0,0,0.2);
    }

    /* Add some padding inside the card container */
    .container {
        padding: 2px 16px;
    }
</style>
- Notice that our CSS refers to our html like it is the only html and CSS. That is because the Vue component controls the CSS and makes sure it only applies to the component.
# Lets now use the AwardCard in our main app code
Inspect the App.vue file
- Add an import of our
AwardCardcomponentimport HelloWorld from './components/HelloWorld.vue' - Add a registration of our AwardCard instead of HelloWorld
- Remove the reference to the vue logo img and
<HelloWorldelement from the template section. - Delete the
HelloWorld.vuecomponent.
Here is our script code in App.vue
<script>
    import AwardCard from './components/AwardCard.vue'

    export default {
        name: 'app',
        components: {
            AwardCard
        },
    data () {
        return {
            awards: [
                {
                id: 1,
                title: 'High Kick',
                detail: 'Kick over your head 10 times in under 10 seconds.',
                imageurl: require('./assets/clouds-fight-jumping-62376.jpg')
                },
                {
                id: 2,
                title: 'Closed Fist',
                detail: 'Break a 1 inch wood board with closed fist.',
                imageurl: require('./assets/aggressive-anger-angry-163431.jpg')
                },
                {
                id: 3,
                title: 'Dragon Spirit',
                detail: 'Complete Your Form 100 Times',
                imageurl: require('./assets/bokeh-daylight-dragon-208326.jpg')
                }
            ]
            }
        }
    }
</script>
- You can see after the import of our component we use
export defaultto bind to the div id="app" in theindex.htmlfile. - We then register the component
AwardCard - And we are setting up our data as objects with fields that our component AwardCard needs.
- App.vue is really just a component that references other components in the components directory.
- This is the pattern, components inside components, etc... in a tree structure.
# Template in App.vue
<template>
  <div id="app">
    <img alt="Active Martial Arts Logo" src="./assets/ActiveLogo.png">
    <ul class="AwardsList">
      <award-card
        v-for="award in awards"
        v-bind:key="award.id"
        v-bind:award="award" />
    </ul>
  </div>
</template>
- We are using the
v-forto create an instance of award-card (AwardCard.vue) for each object in the array Awardsv-for="award in awards" - Then we bind a unique field called key, id
v-bind:key="award.id" - Last we pass in our object award from the array of awards to the prop of the component
v-bind:award="award"
Script
- I only added a dark gradient background to the existing template CSS for App.vue.
- Add this inside the
<style> #app {}code.
background: linear-gradient(
    rgba(200, 200, 200, 0.6),
    rgba(80, 80, 80, 0.7));
Now the style section of App.vue looks like this.
<style>
    #app {
    font-family: "Avenir", Helvetica, Arial, sans-serif;
    -webkit-font-smoothing: antialiased;
    -moz-osx-font-smoothing: grayscale;
    text-align: center;
    color: #2c3e50;
    margin-top: 60px;
    background: linear-gradient(
        rgba(200, 200, 200, 0.6),
        rgba(80, 80, 80, 0.7));
    }
</style>
- Video Link Simple Award App
- Length: 24:50 minutes
- Size: 212 MB
# Run Our App Locally
In the command line, in our project, run the command. (This is detailed in the README.md)
npm run serve
- After it compiles and runs it will show some text like this:
    App running at:
    - Local:   http://localhost:8080/
    - Network: http://192.168.1.178:8080/
- In your web browser on our local machine go to the url http://localhost:8080
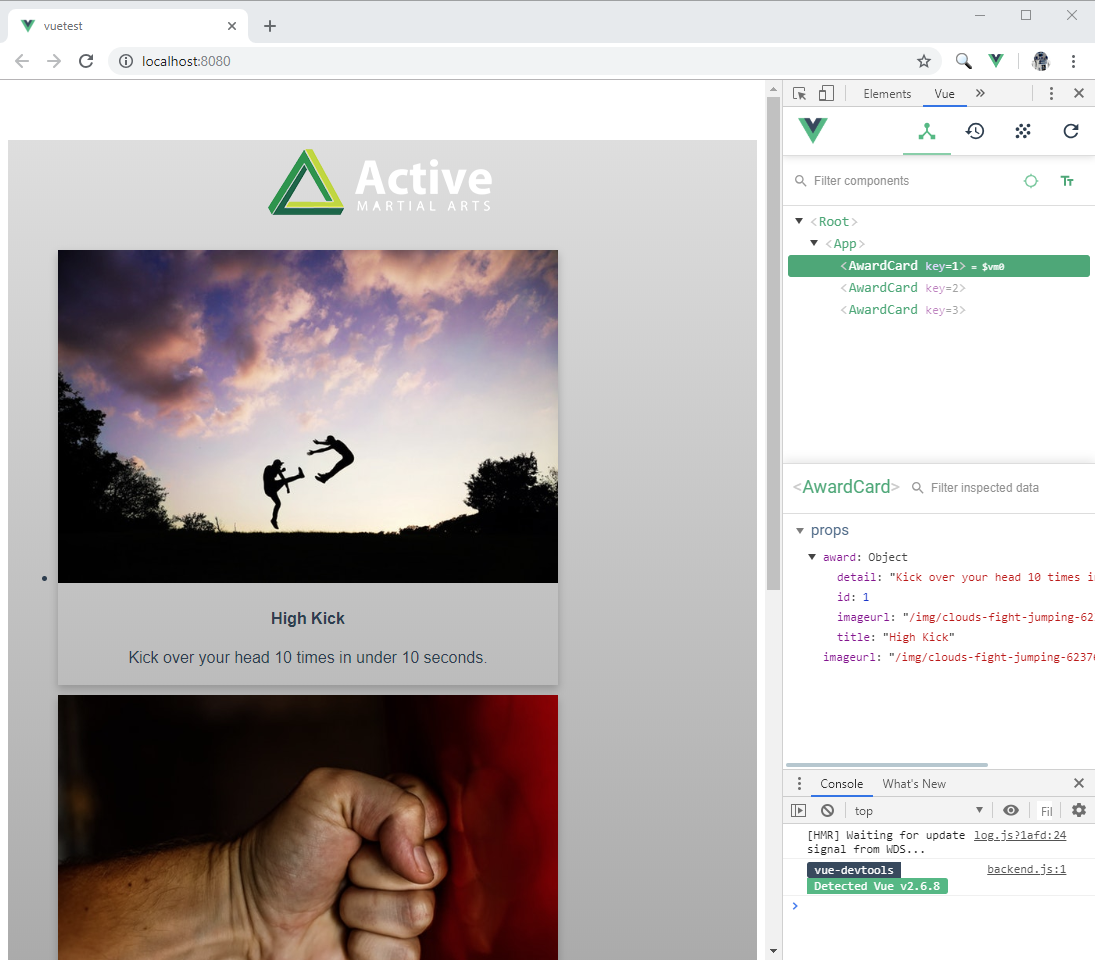
- You will see the new app.
Go into the developer tools F12 and use the Vue Devtools to inspect the Award Cards.

# Assignment due for discussion next class and checked into GitHub by the Monday after that
- Follow along with the lesson and create the lesson21 app and check it into your github account under repo named lesson21.

